
Mascara Application
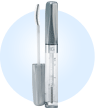
2. Use clear Professional Natural Lash Mascara before you add colour to prime and condition lashes, and to "set" the effects of your eyelash curler.
3. To go to great lengths, place brush at lash line on top of lashes. In a slow, even motion, go from roots to tips. Then go over lash tips again, this time from underneath.
4. For thickness, hold brush as close as possible to base of lashes, and wiggle it as you move it up through lashes. (This motion helps get every lash.) Let mascara dry for 10 seconds, then replace brush at lash base, and wiggle again as you move up the lashes.
1. Clamp an eyelash curler on the roots of lashes and hold for five seconds. Repeat on the middle of lashes and again near the tips.
Eyeshadow Application
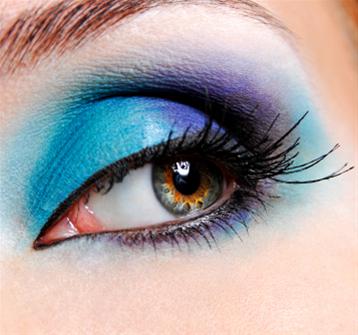
1. Apply a light color over your entire eye lid from lash line to brow. Use a large flat eye shadow brush. Always use good quality brushes.
Colour
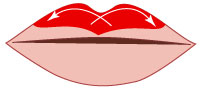
1.With your mouth relaxed, start your colour application by defining the cupid bow, moving the lipstick from the centre upward and outward.
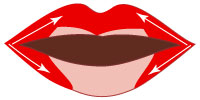
2.Open your mouth wider, and draw the upper and lower lips from the corners to the centre. In the corners, blend your colour into the mouth, keeping it open.
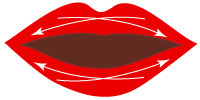
3.Add more lipstick to the centre of your lips with long strokes in different directions. For a more festive look, apply lip gloss in the middle of the lips. *Ensure your lip colour does not extend beyond the contour, especially in the corners, and that there are no traces of lip colour on your teeth.
Maintenance
2. The second step is to apply a medium shadow color on your lower lid from lash line to the crease of your eye. Use a fluff brush.
3.The third step is to use your darkest color as a liner and apply along your lash line. To insure shadow will not flake, dampen your eyeliner brush before applying shadow. This will make it last longer.
Types of eye shadows
*Dark - This is applied only to the eyelids from the lashline to the crease in the eyelid.
*Medium - This is applied from just below the eyelid crease to the browbone.
* Highlight - This is the lightest of the three and is applied to the browbone and extends a little past the outer end of the eyebrow. This usually gives a pearly finish.
Lip Application 
Lip Pencil
Soft pencil can be used as a coloured base if followed by gloss or lip balm.
Don’t attempt to modify your lip contour with soft pencil; this creamy product will not stay where you put it, even if the advertisement says “does not smudge”.
